About Products
Simple Connection Steps
LED Light Strips offer an easy and highly effective way to provide the utmost in efficient, attractive accent lighting in a variety of settings and applications. Here is how LED Light Strips can be readied for mounting in three easy steps:
I. Cut along the light strip tape wherever a dashed line divides two sets of positive and negative connection points.
 II. Peel away a portion of the light strip adhesive backing at one end. With the solderless clamp open, slide the strip end all the way into the solderless clamp. Close the hinged clamp.
 III. Remove the remaining adhesive backing and attach the light strip to the desired surface.

Connection, Switch and Powering options
The information and illustrations below offer recommendations for choosing a general design for your application.
I. Light strip On/Off is controlled by a wall mounted switch
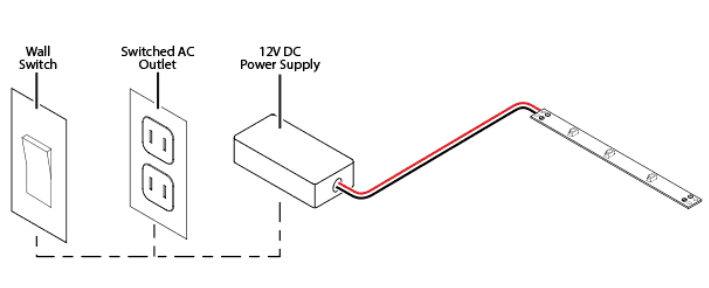
II. Light strip On/Off/Brightness is controlled by an LED dimmer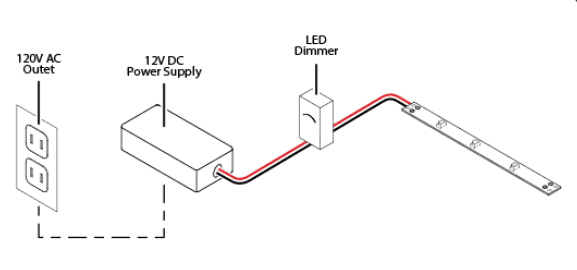
III. Light strip On/Off/Brightness is controlled by an LED dimmer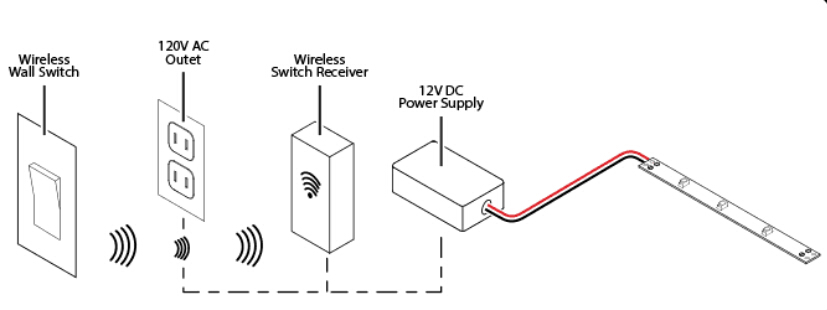
IV. Light strip On/Off/Brightness is controlled by 4 a wireless LED dimmer and signal receiver. 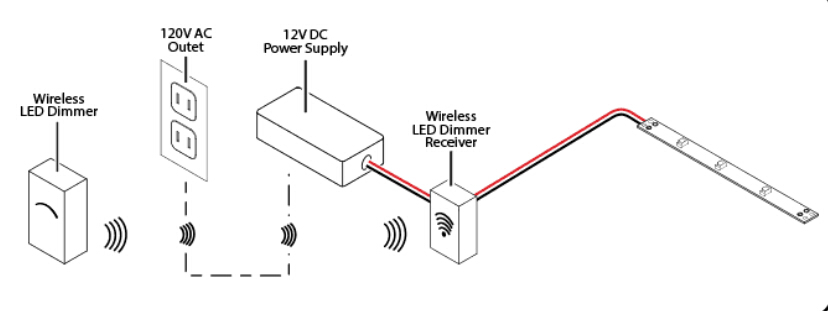 V. Light strip is powered directly by a 12V battery, for applications like boats, RVs, etc.
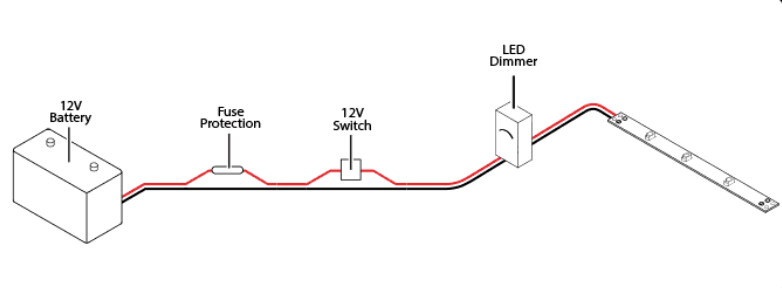
Layout Options
I. Light strips are powered in a continuous Straight run. Strips that are furthest from the power supply are more likely to exhibit voltage drop.
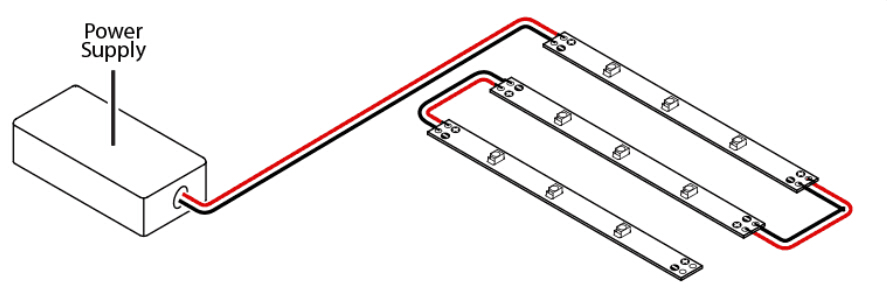 II. Light strips are powered from a spliced Centerfeed connection. This type of layout tends to produce more consistent brightness and color between strips.
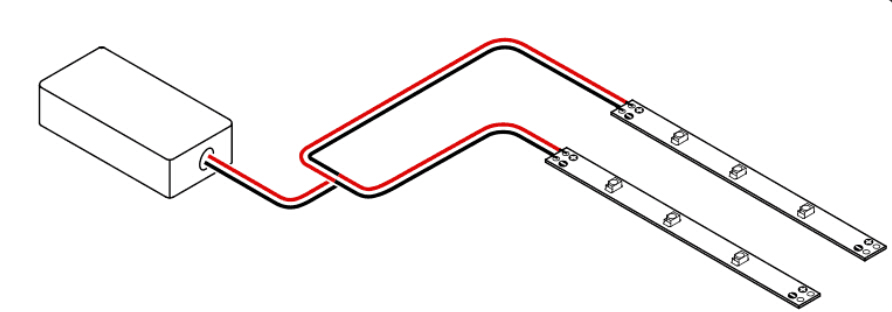 III. Light strips are powered from a single looped Loopback connection, which also produces more consistent results. Often used for room perimeter and cove.
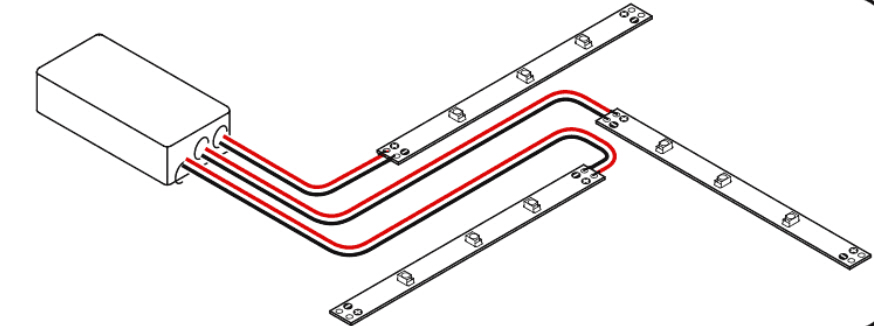
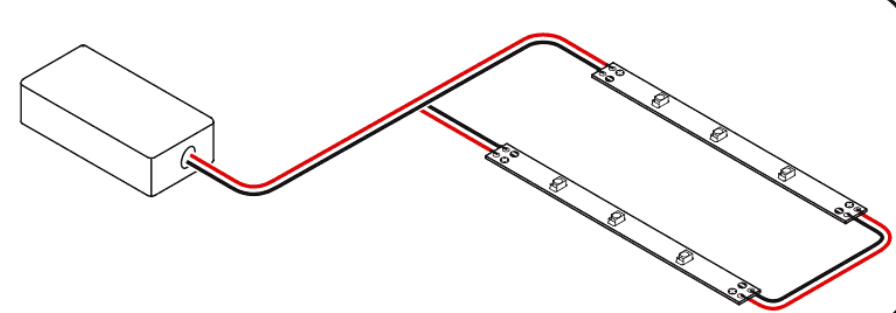 IV. In the Array option, light strip legs are individually powered. Total wattage should be determined so as not to overload power supply.
Yes, they are easy to install. In most cases you just plug the power supply into the controller/dimmer (which then connects to the LED strip), and then plug the power supply into a normal outlet.

